Revisando los ejemplos de Cocos2d para IPhone.
Tengo una vocación frustrada (de momento) que es desarrollar juegos. Por eso periódicamente me animo a investigar sobre estos temas.
El IPhone me tiene loco por su versatilidad y potencia y me apetece seguir profundizando en ello.
En tutorales anteriores en AdictosAltrabajo.com os hemos descubierto cómo empezar a trabajar con el Iphone
(
http://www.adictosaltrabajo.com/tutoriales/tutoriales.php?pagina=oop_con_objetiveC_Iphone) e incluso desplegar una
aplicación en el iphone real (
http://www.adictosaltrabajo.com/tutoriales/tutoriales.php?pagina=iphone-instalar-en-dispositivo).
Para construir un juego supongo que es una locura plantearse hacerlo desde cero cuando hay tanta
gente que generosamente nos ofrece su talento….
Yo he llegado por casualidad al framework Cocos2D y me parece grandioso.
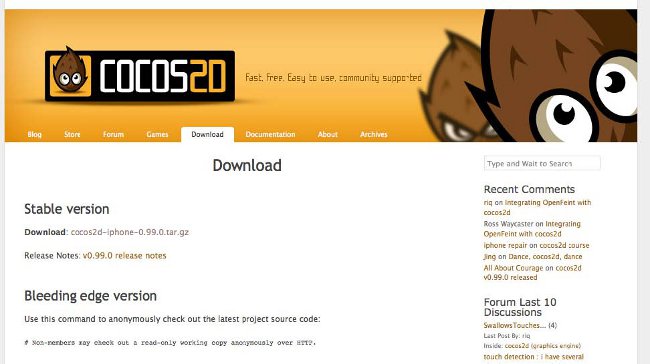
Nos vamos a su Web y lo bajamos http://www.cocos2d-iphone.org/
Sólo hay que ver las decenas juegos que nos dice que hay públicos en el appstore de Mac construidos con él.
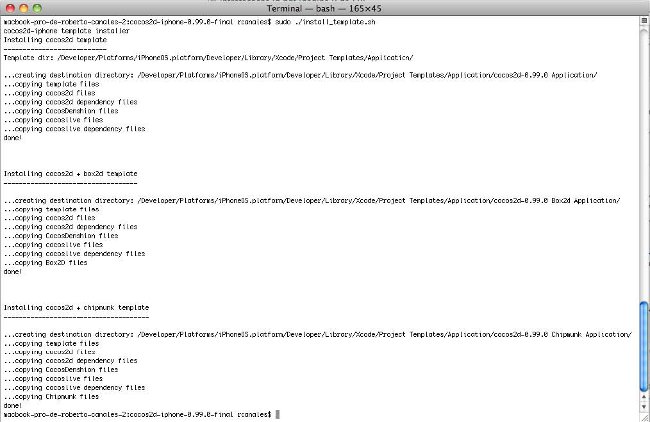
Para instalarlo en tu sistema sólo tienes que ejecutar en tu Mac el script de instalación: install_template.sh
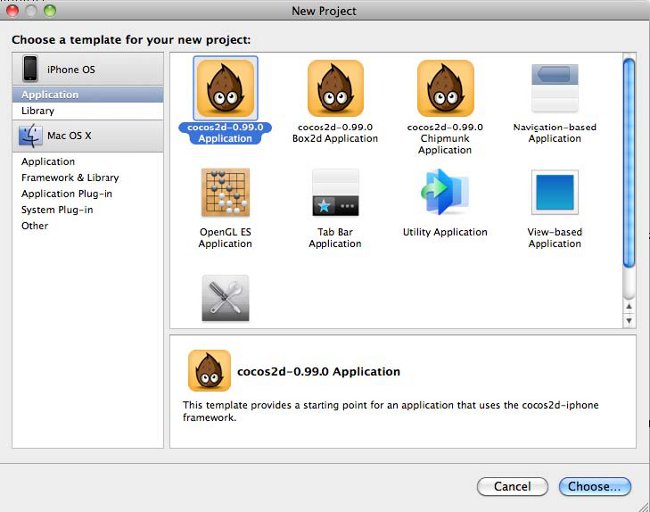
En xcode nos aparecen nuevas pantillas aunque de momento no las vamos a usar, sólo vamos a ver los ejemplos que trae.
Abrimos el proyecto en el directorio de instalación
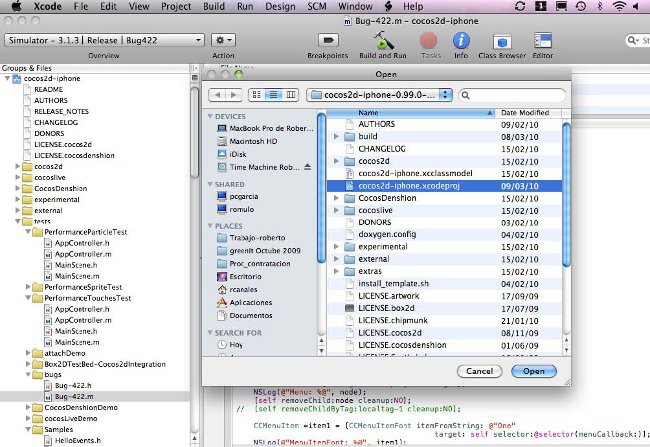
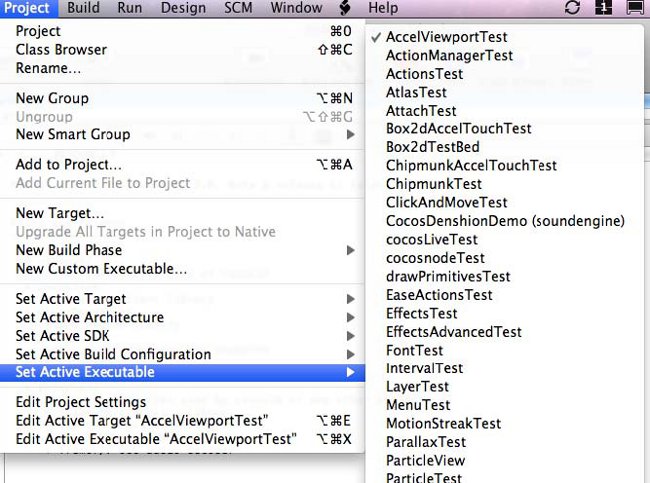
Probablemente os encontréis un pequeño problema recurrentemente y es que al elegir los ejemplos te dé un error
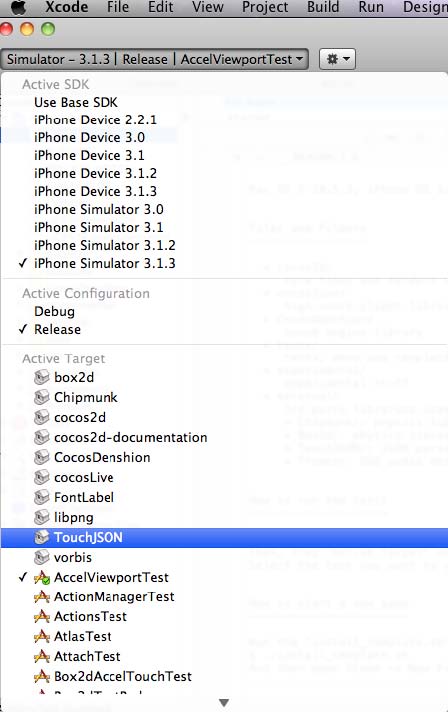
Aseguraos que coinciden ActiveTarget y ActiveExecutable .. con esto lo solucionamos
Voy a revisar los ejemplos uno a uno y he capturado las pantallas y un poco de código… una imagen vale más que mil palabras.
Sólo decir que nada de este código es mío sino que es de los ejemplos de cocos2d.
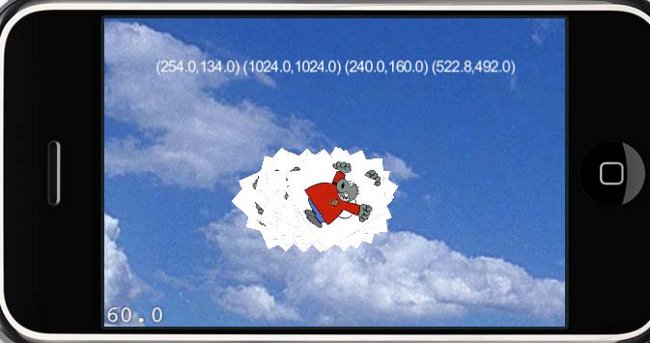
AcelViewTest
Según pinchas o arrastras con el ratón te siguen un montón de muñecos girando

Un ejemplo cargando un fondo y posicionando un array de elemento móviles siguiendo la estela del ratón (dedo).
Podría ser un esqueletillo para un juego tipo serpientes … Le he cambiado el logo por el de la mosca de Autentia …
sin problemas a la hora de hacer cambios y desplegar en el simulador del iphone ni en el teléfono real.
ActionManagerTest
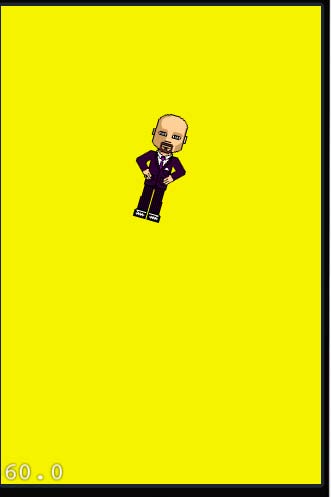
Cómo con cuatro líneas cargar un sprite y programarle acciones.
-(id) init
{
   if( (self=[super init] )) {
      CCSprite *child = [CCSprite spriteWithFile:@"grossini.png"];
      [child setPosition:ccp(200,200)];
      [self addChild:child z:1];

      //Sum of all action's duration is 1.5 second.
      [child runAction:[CCRotateBy actionWithDuration:1.5f angle:90]];
      [child runAction:[CCSequence actions:
                       [CCDelayTime actionWithDuration:1.4f],
                       [CCFadeOut actionWithDuration:1.1f],
                       nil]
      ];

      //After 1.5 second, self will be removed.
      [self runAction:[CCSequence actions:
                      [CCDelayTime actionWithDuration:1.4f],
                      [CCCallFunc actionWithTarget:self selector:@selector(removeThis)],
                      nil]
      ];
    }
    return self;
}
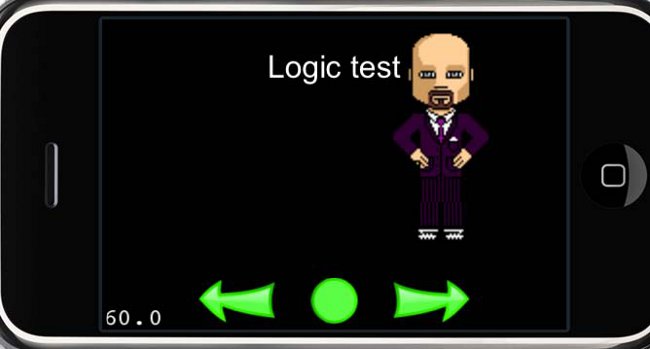
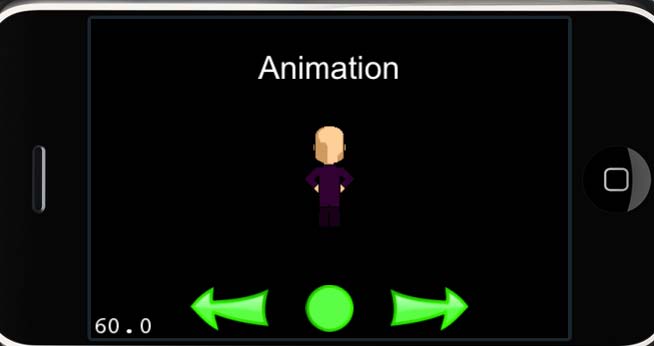
AnimationManagerTest
Aquí vemos otras opciones como: Escalados, saltos, animaciones, etc
-(void) onEnter
{
[super onEnter];
[self centerSprites:1];
CCAnimation* animation = [CCAnimation animationWithName:@"dance" delay:0.2f];
for( int i=1;i
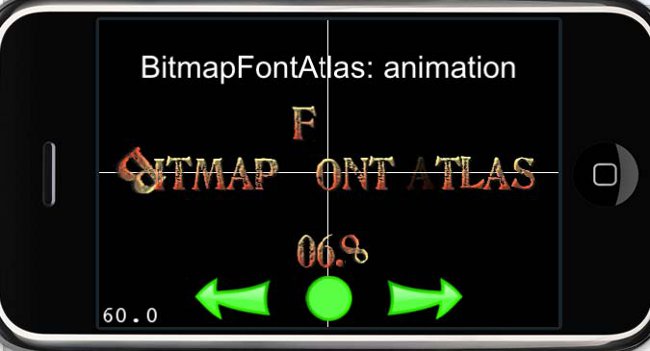
AtlasTest
Cómo construir una fuente especial y animar sus distintos caracteres.
/** Use any of these editors to generate bitmap font atlas:
*http://www.n4te.com/hiero/hiero.jnlp
*http://slick.cokeandcode.com/demos/hiero.jnlp
*http://www.angelcode.com/products/bmfont/
*/
@implementation Atlas4
-(id) init
{
if( (self=[super init]) ) {
// Upper Label
CCBitmapFontAtlas *label = [CCBitmapFontAtlas bitmapFontAtlasWithString:@"Bitmap Font Atlas" fntFile:@"bitmapFontTest.fnt"];
[self addChild:label];
CGSize s = [[CCDirector sharedDirector] winSize];
label.position = ccp(s.width/2, s.height/2);
label.anchorPoint = ccp(0.5f, 0.5f);
CCSprite *BChar = (CCSprite*) [label getChildByTag:0];
CCSprite *FChar = (CCSprite*) [label getChildByTag:7];
CCSprite *AChar = (CCSprite*) [label getChildByTag:12];
id rotate = [CCRotateBy actionWithDuration:2 angle:360];
id rot_4ever = [CCRepeatForever actionWithAction:rotate];
id scale = [CCScaleBy actionWithDuration:2 scale:1.5f];
id scale_back = [scale reverse];
id scale_seq = [CCSequence actions:scale, scale_back,nil];
id scale_4ever = [CCRepeatForever actionWithAction:scale_seq];
id jump = [CCJumpBy actionWithDuration:0.5f position:CGPointZero height:60 jumps:1];
id jump_4ever = [CCRepeatForever actionWithAction:jump];
id fade_out = [CCFadeOut actionWithDuration:1];
id fade_in = [CCFadeIn actionWithDuration:1];
id seq = [CCSequence actions:fade_out, fade_in, nil];
id fade_4ever = [CCRepeatForever actionWithAction:seq];
[BChar runAction:rot_4ever];
[BChar runAction:scale_4ever];
[FChar runAction:jump_4ever];
[AChar runAction:fade_4ever];
// Bottom Label
CCBitmapFontAtlas *label2 = [CCBitmapFontAtlas bitmapFontAtlasWithString:@"00.0" fntFile:@"bitmapFontTest.fnt"];
[self addChild:label2 z:0 tag:kTagBitmapAtlas2]; label2.position = ccp(s.width/2.0f, 80);
CCSprite *lastChar = (CCSprite*) [label2 getChildByTag:3];
[lastChar runAction: [[rot_4ever copy] autorelease]];
[self schedule:@selector(step:) interval:0.1f];
}
return self;
}
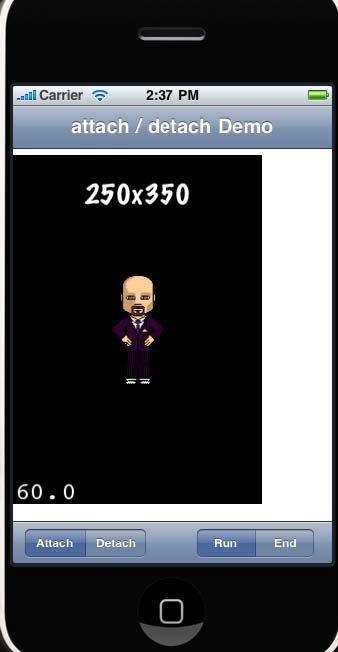
AtachDemo
Cómo asociar a una ventana de iphone la ventana de cocos2d
// Use attach / detach
// To hide / unhide the cocos2d view.
// If you want to remove them, use runWithScene / end
// IMPORTANT: Memory is not released if you use attach / detach
//
-(void) attachView {
if( state == kStateDetach ) {
[[CCDirector sharedDirector] attachInView:mainView withFrame:CGRectMake(0, 0, 250,350)];
[[CCDirector sharedDirector] startAnimation];
state = kStateAttach;
}
else
NSLog(@"Dettach the view before attaching it");
}
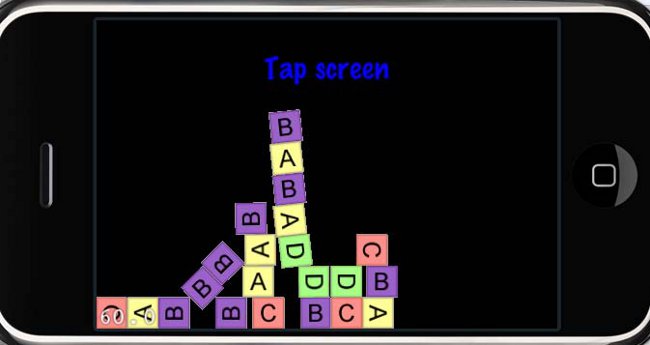
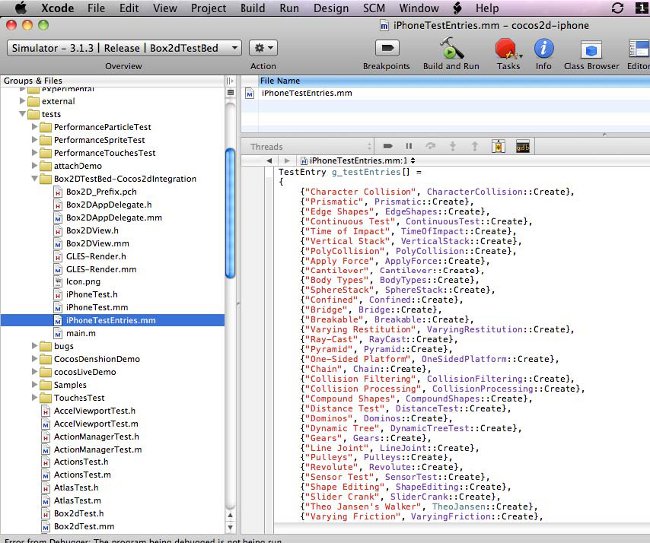
Box2dTest
Es impresionante ver cómo con un código minúsculo tenemos un sistema sensible a la gravedad y a acelerómetro utilizando el fotor de físicas Box2d.
-(void) addNewSpriteWithCoords:(CGPoint)p
{
CCLOG(@"Add sprite %0.2f x %02.f",p.x,p.y);
CCSpriteSheet *sheet = (CCSpriteSheet*) [self getChildByTag:TagSpriteManager];
//We have a 64x64 sprite sheet with 4 different 32x32 images. The following code is
//just randomly picking one of the images
int idx = (CCRANDOM_0_1() > .5 ? 0:1);
int idy = (CCRANDOM_0_1() > .5 ? 0:1);
CCSprite *sprite = [sheet createSpriteWithRect:CGRectMake(32 * idx,32 * idy,32,32)];
[sheet addChild:sprite];
sprite.position = ccp( p.x, p.y);
// Define the dynamic body.
//Set up a 1m squared box in the physics world
b2BodyDef bodyDef;
bodyDef.type = b2_dynamicBody;
bodyDef.position.Set(p.x/PTM_RATIO, p.y/PTM_RATIO);
bodyDef.userData = sprite;
b2Body *body = world->CreateBody(&bodyDef);
// Define another box shape for our dynamic body.
b2PolygonShape dynamicBox;
dynamicBox.SetAsBox(.5f, .5f);//These are mid points for our 1m box
// Define the dynamic body fixture.
b2FixtureDef fixtureDef;
fixtureDef.shape = &dynamicBox;
fixtureDef.density = 1.0f;
fixtureDef.friction = 0.3f;
body->CreateFixture(&fixtureDef);
}
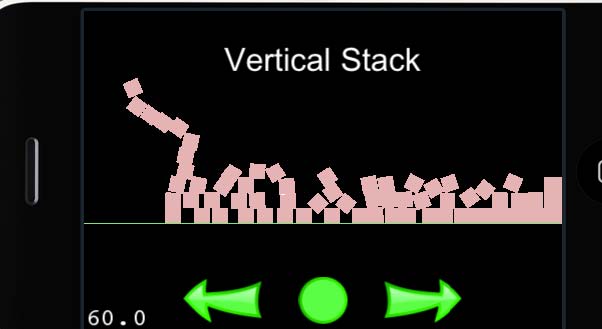
Box2dTestDeb
Decenas de ejemplos impresionantes de framework complementario Box2d
Como unas torres son destruidas por el impacto de un proyectil
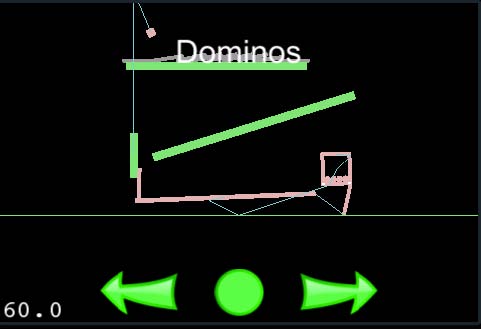
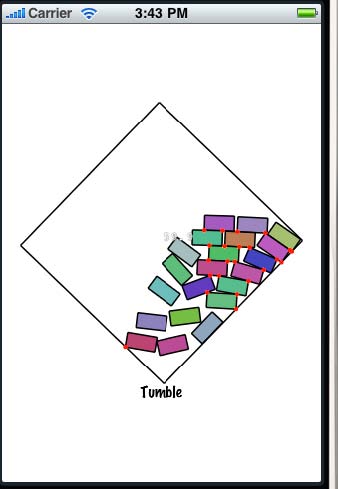
Un juego de dominó
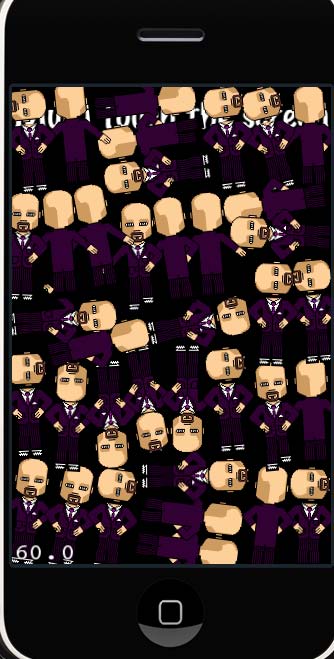
ChipmunkAccelTouch Vemos ejemplos de otro framwework complementario para efectos físicos del iphone llamado Chipmunk
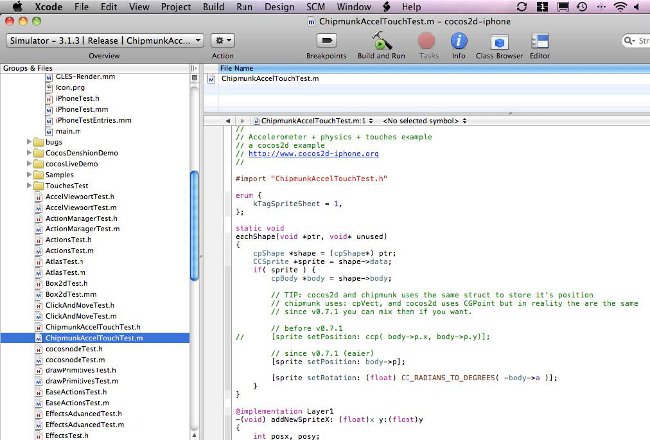
Vamos insertando muñecos que se van estorbando y echando unos a otros.
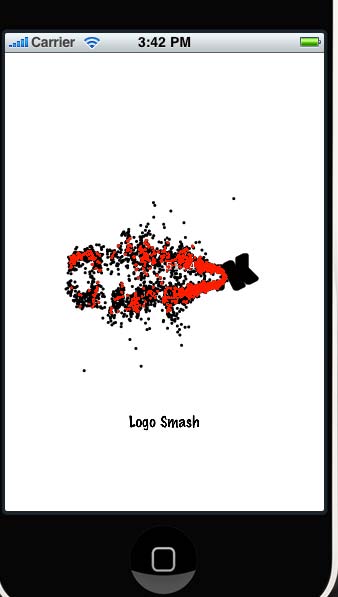
ChipmunkText
Arranca un montón de nuevos ejemplos de efectos físicos.
El primero es impresionante, como un proyectil destroza el logo.
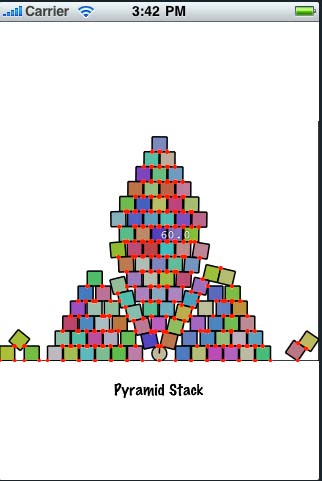
Vemos una pirámide que se desmorona
La caída de decenas de elementos chocando con piezas fijas
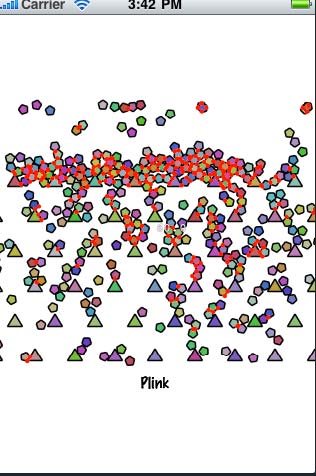
Un cuadrado lleno de piezas en plan caleidoscopio.
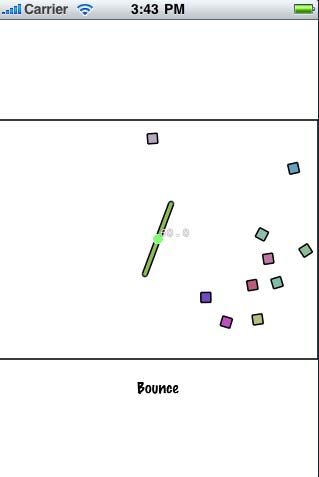
Un segmento central que se mueve donde chocan distintos elementos.
ClickAndMoveTest Movimientos sencillos
-(void)ccTouchesEnded:(NSSet *)touches withEvent:(UIEvent *)event
{
UITouch *touch = [touches anyObject];
CGPoint location = [touch locationInView: [touch view]];
CGPoint convertedLocation = [[CCDirector sharedDirector] convertToGL:location];
CCNode *s = [self getChildByTag:kTagSprite];
[s stopAllActions];
[s runAction: [CCMoveTo actionWithDuration:1 position:ccp(convertedLocation.x, convertedLocation.y)]];
float o = convertedLocation.x - [s position].x;
float a = convertedLocation.y - [s position].y;
float at = (float) CC_RADIANS_TO_DEGREES( atanf( o/a) );
if( a
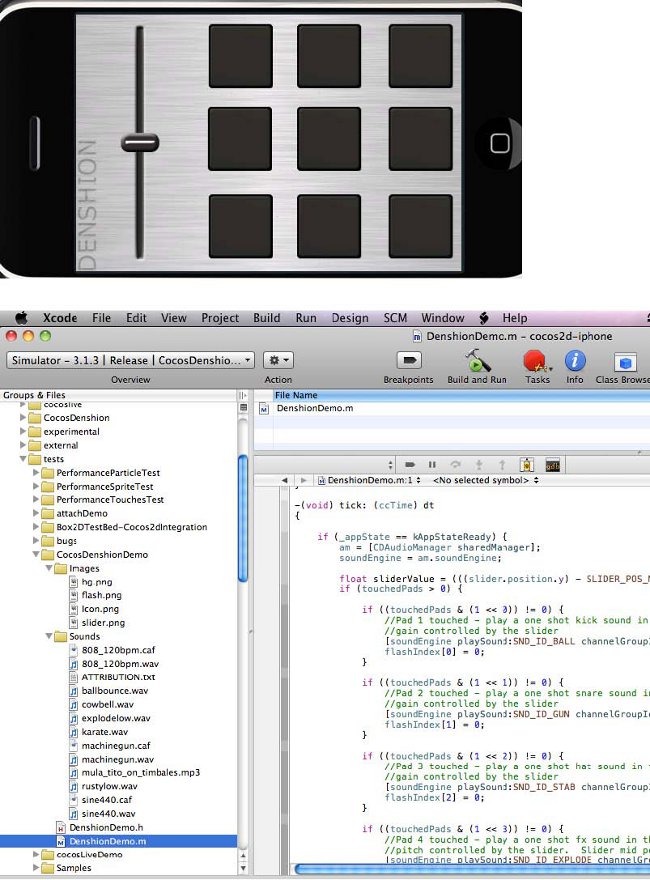
CocosDension
Efectos de sonido (experimental). Da gusto probarlo en el dispositivo real.
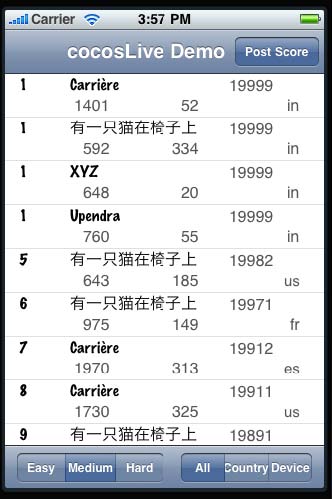
CocosLiveTest
Uso de tablas de datos para llevar las puntuaciones
CocosNoteTest
Giros complejos como de cámara
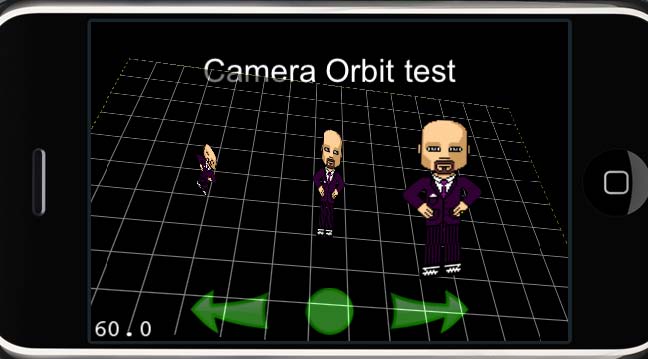
Elementos girando alrededor de otros elementos
Efectos de partículas y fuego
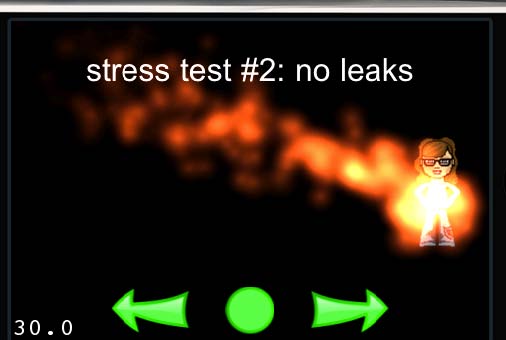
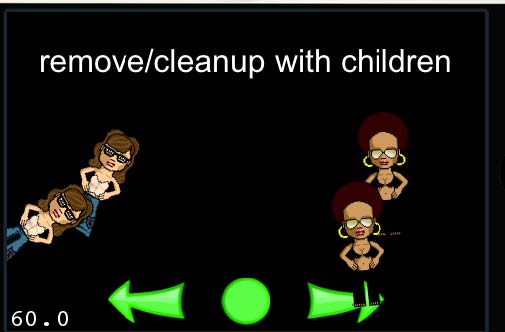
@implementation StressTest2 -(id) init {
//
// Purpose of this test:
// Objects should be released when a layer is removed
//
if( ( self=[super init]) ) {
CGSize s = [[CCDirector sharedDirector] winSize];
CCLayer *sublayer = [CCLayer node];
CCSprite *sp1 = [CCSprite spriteWithFile:@"grossinis_sister1.png"];
sp1.position = ccp(80, s.height/2);
id move = [CCMoveBy actionWithDuration:3 position:ccp(350,0)];
id move_ease_inout3 = [CCEaseInOut actionWithAction:[[move copy] autorelease] rate:2.0f];
id move_ease_inout_back3 = [move_ease_inout3 reverse];
id seq3 = [CCSequence actions: move_ease_inout3, move_ease_inout_back3, nil];
[sp1 runAction: [CCRepeatForever actionWithAction:seq3]];
[sublayer addChild:sp1 z:1];
CCParticleFire *fire = [CCParticleFire node];
fire.position = ccp(80, s.height/2-50);
id copy_seq3 = [[seq3 copy] autorelease];
[fire runAction:[CCRepeatForever actionWithAction:copy_seq3]];
[sublayer addChild:fire z:2];
[self schedule:@selector(shouldNotLeak:) interval:6.0f];
[self addChild:sublayer z:0 tag:kTagSprite1];
}
return self;
}
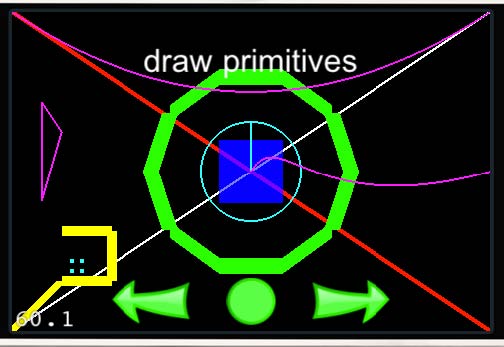
DrawPrimitives
Dibujo de figuras simples usando OpenGL
-(void) draw {
CGSize s = [[CCDirector sharedDirector] winSize];
// draw a simple line
// The default state is:
// Line Width: 1
// color: 255,255,255,255 (white, non-transparent)
// Anti-Aliased
glEnable(GL_LINE_SMOOTH);
ccDrawLine( ccp(0, 0), ccp(s.width, s.height) );
// line: color, width, aliased
// glLineWidth > 1 and GL_LINE_SMOOTH are not compatible
// GL_SMOOTH_LINE_WIDTH_RANGE = (1,1) on iPhone
glDisable(GL_LINE_SMOOTH);
glLineWidth( 5.0f );
glColor4ub(255,0,0,255);
ccDrawLine( ccp(0, s.height), ccp(s.width, 0) );
// TIP:
// If you are going to use always the same color or width, you don't
// need to call it before every draw
//
// Remember: OpenGL is a state-machine.
// draw big point in the center
glPointSize(64);
glColor4ub(0,0,255,128);
ccDrawPoint( ccp(s.width / 2, s.height / 2) );
// draw 4 small points
CGPoint points[] = { ccp(60,60), ccp(70,70), ccp(60,70), ccp(70,60) };
glPointSize(4);
glColor4ub(0,255,255,255);
ccDrawPoints( points, 4);
// draw a green circle with 10 segments
glLineWidth(16);
glColor4ub(0, 255, 0, 255);
ccDrawCircle( ccp(s.width/2, s.height/2), 100, 0, 10, NO);
// draw a green circle with 50 segments with line to center
glLineWidth(2);
glColor4ub(0, 255, 255, 255);
ccDrawCircle( ccp(s.width/2, s.height/2), 50, CC_DEGREES_TO_RADIANS(90), 50, YES);
// open yellow poly
glColor4ub(255, 255, 0, 255);
glLineWidth(10);
CGPoint vertices[] = { ccp(0,0), ccp(50,50), ccp(100,50), ccp(100,100), ccp(50,100) };
ccDrawPoly( vertices, 5, NO);
// closed purble poly
glColor4ub(255, 0, 255, 255);
glLineWidth(2);
CGPoint vertices2[] = { ccp(30,130), ccp(30,230), ccp(50,200) };
ccDrawPoly( vertices2, 3, YES);
// draw quad bezier path
ccDrawQuadBezier(ccp(0,s.height), ccp(s.width/2,s.height/2), ccp(s.width,s.height), 50);
// draw cubic bezier path
ccDrawCubicBezier(ccp(s.width/2, s.height/2), ccp(s.width/2+30,s.height/2+50), ccp(s.width/2+60,s.height/2-50),ccp(s.width, s.height/2),100);
// restore original values
glLineWidth(1);
glColor4ub(255,255,255,255);
glPointSize(1);
}
EasyActionTest
Acciones programadas como efecto elásticos.
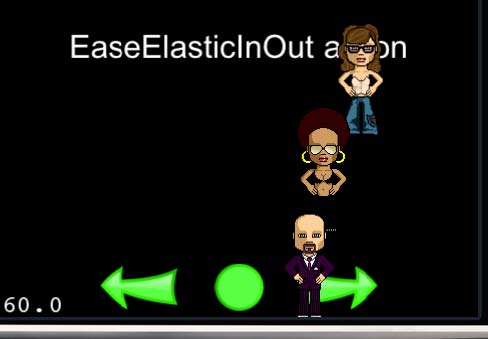
@implementation SpriteEaseElasticInOut
-(void) onEnter
{
[super onEnter];
id move = [CCMoveBy actionWithDuration:3 position:ccp(350,0)];
id move_ease_inout1 = [CCEaseElasticInOut actionWithAction:[[move copy] autorelease] period:0.3f];
id move_ease_inout_back1 = [move_ease_inout1 reverse];
id move_ease_inout2 = [CCEaseElasticInOut actionWithAction:[[move copy] autorelease] period:0.45f];
id move_ease_inout_back2 = [move_ease_inout2 reverse];
id move_ease_inout3 = [CCEaseElasticInOut actionWithAction:[[move copy] autorelease] period:0.6f];
id move_ease_inout_back3 = [move_ease_inout3 reverse];
id seq1 = [CCSequence actions: move_ease_inout1, move_ease_inout_back1, nil];
id seq2 = [CCSequence actions: move_ease_inout2, move_ease_inout_back2, nil];
id seq3 = [CCSequence actions: move_ease_inout3, move_ease_inout_back3, nil];
[tamara runAction: [CCRepeatForever actionWithAction:seq1]];
[kathia runAction: [CCRepeatForever actionWithAction:seq2]];
[grossini runAction: [CCRepeatForever actionWithAction:seq3]];
}

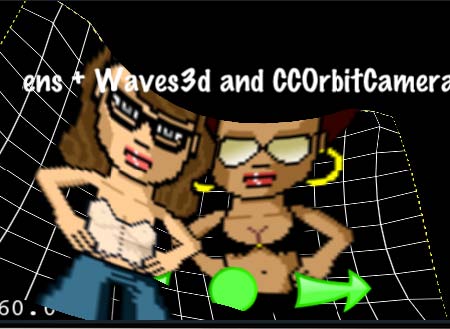
EffectAdvancetest
Efectos más avanzados como insertar sprites en ondas
@implementation Effect1
-(void) onEnter
{
[super onEnter];
id target = [self getChildByTag:kTagBackground];
// To reuse a grid the grid size and the grid type must be the same.
// in this case:
// Lens3D is Grid3D and it's size is (15,10)
// Waves3D is Grid3D and it's size is (15,10)
CGSize size = [[CCDirector sharedDirector] winSize];
id lens = [CCLens3D actionWithPosition:ccp(size.width/2,size.height/2) radius:240 grid:ccg(15,10) duration:0.0f];
id waves = [CCWaves3D actionWithWaves:18 amplitude:15 grid:ccg(15,10) duration:10];
id reuse = [CCReuseGrid actionWithTimes:1];
id delay = [CCDelayTime actionWithDuration:8];
id orbit = [CCOrbitCamera actionWithDuration:5 radius:1 deltaRadius:2 angleZ:0 deltaAngleZ:180 angleX:0 deltaAngleX:-90];
id orbit_back = [orbit reverse];
[target runAction: [CCRepeatForever actionWithAction: [CCSequence actions: orbit, orbit_back, nil]]];
[target runAction: [CCSequence actions: lens, delay, reuse, waves, nil]];
}
-(NSString*) title
{
return @"Lens + Waves3d and CCOrbitCamera";
}
@end
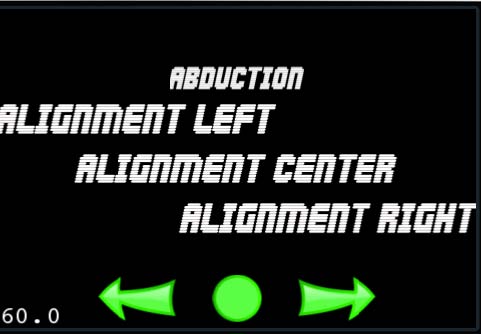
FontTest
uso de fuentes para hacer los títulos
-(void)showFont:(NSString *)aFont
{
[self removeChildByTag:kTagLabel1 cleanup:YES]; [self removeChildByTag:kTagLabel2 cleanup:YES];
[self removeChildByTag:kTagLabel3 cleanup:YES];
[self removeChildByTag:kTagLabel4 cleanup:YES];
CCLabel *top = [CCLabel labelWithString:aFont fontName:aFont fontSize:24];
CCLabel *left = [CCLabel labelWithString:@"alignment left" dimensions:GSizeMake(480,50)
alignment:UITextAlignmentLeft fontName:aFont fontSize:32];
CCLabel *center = [CCLabel labelWithString:@"alignment center" dimensions:CGSizeMake(480,50)
alignment:UITextAlignmentCenter fontName:aFont fontSize:32];
CCLabel *right = [CCLabel labelWithString:@"alignment right" dimensions:CGSizeMake(480,50)
alignment:UITextAlignmentRight fontName:aFont fontSize:32];
CGSize s = [[CCDirector sharedDirector] winSize];
top.position = ccp(s.width/2,250);
left.position = ccp(s.width/2,200);
center.position = ccp(s.width/2,150);
right.position = ccp(s.width/2,100);
[[[[self addChild:left z:0 tag:kTagLabel1]
addChild:right z:0 tag:kTagLabel2]
addChild:center z:0 tag:kTagLabel3]
addChild:top z:0 tag:kTagLabel4];
}
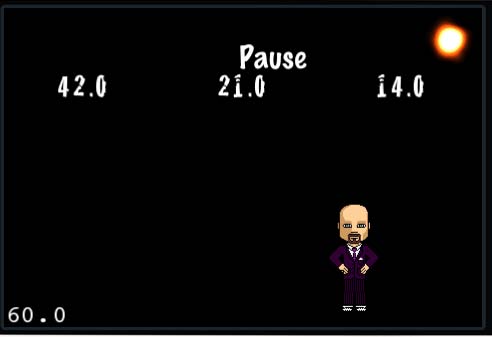
IntervalTest
Utilización de intervalos a distintos periodos
@implementation Layer1
-(id) init
{
if( (self=[super init])) {
CGSize s = [[CCDirector sharedDirector] winSize];
// sun
CCParticleSystem* sun = [CCParticleSun node];
sun.position = ccp(s.width-32,s.height-32);
sun.totalParticles = 130;
sun.life = 0.6f;
[self addChild:sun];
// timers
label1 = [CCBitmapFontAtlas bitmapFontAtlasWithString:@"0" fntFile:@"bitmapFontTest4.fnt"];
label2 = [CCBitmapFontAtlas bitmapFontAtlasWithString:@"0" fntFile:@"bitmapFontTest4.fnt"];
label3 = [CCBitmapFontAtlas bitmapFontAtlasWithString:@"0" fntFile:@"bitmapFontTest4.fnt"];
[self schedule: @selector(step1:) interval: 0.5f];
[self schedule: @selector(step2:) interval:1.0f];
[self schedule: @selector(step3:) interval: 1.5f];
label1.position = ccp(80,s.width/2);
label2.position = ccp(240,s.width/2);
label3.position = ccp(400,s.width/2);
[self addChild:label1];
[self addChild:label2];
[self addChild:label3];
// Sprite
CCSprite *sprite = [CCSprite spriteWithFile:@"grossini.png"];
sprite.position = ccp(40,50);
id jump = [CCJumpBy actionWithDuration:3 position:ccp(400,0) height:50 jumps:4];
[self addChild:sprite];
[sprite runAction:
[CCRepeatForever actionWithAction:
[CCSequence actions: jump, [jump reverse], nil]
]
];
// pause button
CCMenuItem *item1 = [CCMenuItemFont itemFromString: @"Pause" target: self selector:@selector(pause:)];
CCMenu *menu = [CCMenu menuWithItems: item1, nil]; menu.position = ccp(s.height-50, 270);
[self addChild: menu];
}
return self;
}
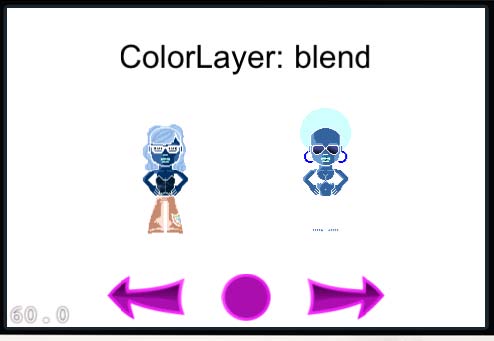
LayerTest
Interacción entre en ratón (dedo de la pantalla táctil) y los objetos.
Cambios de escena.
@implementation LayerTestBlend
-(id) init
{
if( (self=[super init] )) {
CGSize s = [[CCDirector sharedDirector] winSize];
CCColorLayer* layer1 = [CCColorLayer layerWithColor: ccc4(255, 255, 255, 80)];
CCSprite *sister1 = [CCSprite spriteWithFile:@"grossinis_sister1.png"];
CCSprite *sister2 = [CCSprite spriteWithFile:@"grossinis_sister2.png"];
[self addChild:sister1];
[self addChild:sister2];
[self addChild: layer1 z:100 tag:kTagLayer];
sister1.position = ccp( 160, s.height/2);
sister2.position = ccp( 320, s.height/2);
[self schedule:@selector(newBlend:) interval:1];
}
return self;
}
-(void) newBlend:(ccTime)dt
{
CCColorLayer *layer = (CCColorLayer*) [self getChildByTag:kTagLayer];
if( layer.blendFunc.dst == GL_ZERO )
[layer setBlendFunc: (ccBlendFunc) { CC_BLEND_SRC, CC_BLEND_DST } ];
else
[layer setBlendFunc:(ccBlendFunc){GL_ONE_MINUS_DST_COLOR, GL_ZERO}];
}
-(NSString *) title {
return @"ColorLayer: blend";
}
@end
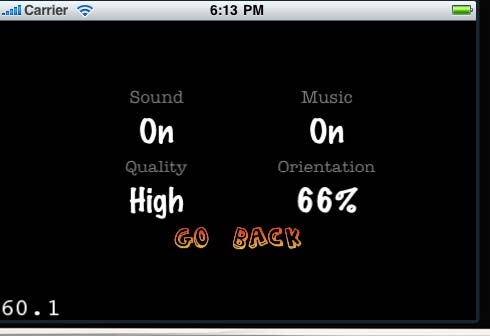
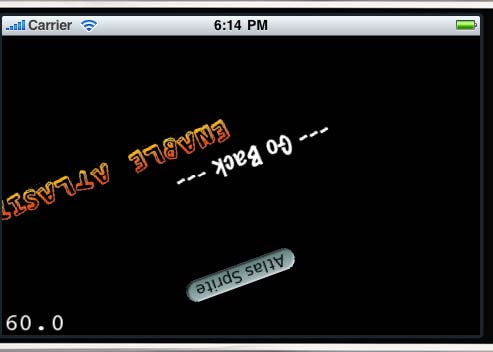
MenuTest
Menús con distintos tipos de aspectos.
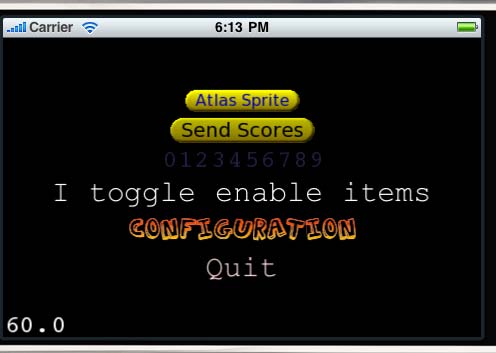
Y elementos de configuración
@implementation Layer4
-(id) init
{
[super init];
[CCMenuItemFont setFontName: @"American Typewriter"];
[CCMenuItemFont setFontSize:18];
CCMenuItemFont *title1 = [CCMenuItemFont itemFromString: @"Sound"];
[title1 setIsEnabled:NO];
[CCMenuItemFont setFontName: @"Marker Felt"];
[CCMenuItemFont setFontSize:34];
CCMenuItemToggle *item1 = [CCMenuItemToggle itemWithTarget:self selector:@selector(menuCallback:) items:
[CCMenuItemFont itemFromString: @"On"],
[CCMenuItemFont itemFromString: @"Off"],
nil];
[CCMenuItemFont setFontName: @"American Typewriter"];
[CCMenuItemFont setFontSize:18];
CCMenuItemFont *title2 = [CCMenuItemFont itemFromString: @"Music"];
[title2 setIsEnabled:NO];
[CCMenuItemFont setFontName: @"Marker Felt"];
[CCMenuItemFont setFontSize:34];
CCMenuItemToggle *item2 = [CCMenuItemToggle itemWithTarget:self selector:@selector(menuCallback:) items:
[CCMenuItemFont itemFromString: @"On"], [CCMenuItemFont itemFromString: @"Off"], nil];
[CCMenuItemFont setFontName: @"American Typewriter"];
[CCMenuItemFont setFontSize:18];
CCMenuItemFont *title3 = [CCMenuItemFont itemFromString: @"Quality"];
[title3 setIsEnabled:NO];
[CCMenuItemFont setFontName: @"Marker Felt"];
[CCMenuItemFont setFontSize:34];
CCMenuItemToggle *item3 = [CCMenuItemToggle itemWithTarget:self selector:@selector(menuCallback:) items:
[CCMenuItemFont itemFromString: @"High"],
[CCMenuItemFont itemFromString: @"Low"],
nil];
[CCMenuItemFont setFontName: @"American Typewriter"];
[CCMenuItemFont setFontSize:18];
CCMenuItemFont *title4 = [CCMenuItemFont itemFromString: @"Orientation"];
[title4 setIsEnabled:NO];
[CCMenuItemFont setFontName: @"Marker Felt"];
[CCMenuItemFont setFontSize:34];
CCMenuItemToggle *item4 = [CCMenuItemToggle itemWithTarget:self selector:@selector(menuCallback:) items:
[CCMenuItemFont itemFromString: @"Off"],
nil];
NSArray *more_items = [NSArray arrayWithObjects:
[CCMenuItemFont itemFromString: @"33%"],
[CCMenuItemFont itemFromString: @"66%"],
[CCMenuItemFont itemFromString: @"100%"],
nil];
// TIP: you can manipulate the items like any other NSMutableArray
[item4.subItems addObjectsFromArray: more_items];
// you can change the one of the items by doing this
item4.selectedIndex = 2;
[CCMenuItemFont setFontName: @"Marker Felt"];
[CCMenuItemFont setFontSize:34];
CCBitmapFontAtlas *label = [CCBitmapFontAtlas bitmapFontAtlasWithString:@"go back" fntFile:@"bitmapFontTest3.fnt"];
CCMenuItemLabel *back = [CCMenuItemLabel itemWithLabel:label target:self selector:@selector(backCallback:)];
CCMenu *menu = [CCMenu menuWithItems:
title1, title2,
item1, item2,
title3, title4,
item3, item4,
back, nil]; // 9 items.
[menu alignItemsInColumns:
[NSNumber numberWithUnsignedInt:2],
[NSNumber numberWithUnsignedInt:2],
[NSNumber numberWithUnsignedInt:2],
[NSNumber numberWithUnsignedInt:2],
[NSNumber numberWithUnsignedInt:1],
nil
]; // 2 + 2 + 2 + 2 + 1 = total count of 9.
[self addChild: menu];
return self;
}
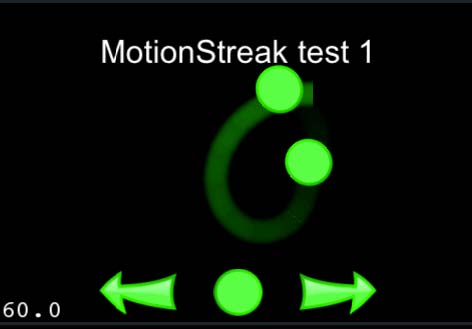
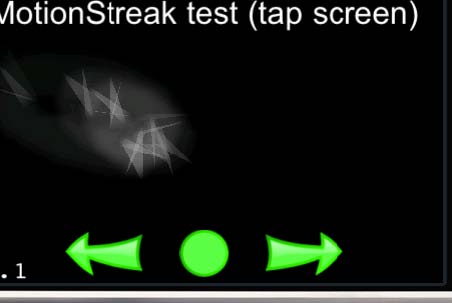
MotionStreakTest
Movimientos y efectos de estela.
-(void) onEnter
{
[super onEnter];
CGSize s = [[CCDirector sharedDirector] winSize];
// the root object just rotates around
root = [CCSprite spriteWithFile:@"r1.png"];
[self addChild: root z:1];
[root setPosition: ccp(s.width/2, s.height/2)];
// the target object is offset from root, and the streak is moved to follow it
target = [CCSprite spriteWithFile:@"r1.png"];
[root addChild:target];
[target setPosition:ccp(100,0)];
// create the streak object and add it to the scene
streak = [CCMotionStreak streakWithFade:2 minSeg:3 image:@"streak.png" width:32 length:32 color:ccc4(0,255,0,255)];
[self addChild:streak];
// schedule an update on each frame so we can syncronize the streak with the target
[self schedule:@selector(onUpdate:)];
id a1 = [CCRotateBy actionWithDuration:2 angle:360];
id action1 = [CCRepeatForever actionWithAction:a1];
id motion = [CCMoveBy actionWithDuration:2 position:ccp(100,0)];
[root runAction:[CCRepeatForever actionWithAction:[CCSequence actions:motion, [motion reverse], nil]]];
[root runAction:action1];
}
-(void)onUpdate:(ccTime)delta
{
// CGPoint p = [target absolutePosition];
// float r = [root rotation];
[streak setPosition:[target convertToWorldSpace:CGPointZero]];
}
-(void) onEnter {
[super onEnter];
self.isTouchEnabled = YES;
CGSize s = [[CCDirector sharedDirector] winSize];
// create the streak object and add it to the scene
streak = [CCMotionStreak streakWithFade:3 minSeg:3 image:@"streak.png" width:64 length:32 color:ccc4(255,255,255,255)];
[self addChild:streak];
streak.position = ccp(s.width/2, s.height/2);
}
-(void)ccTouchesMoved:(NSSet *)touches withEvent:(UIEvent *)event
{
UITouch *touch = [touches anyObject];
CGPoint touchLocation = [touch locationInView: [touch view]];
touchLocation = [[CCDirector sharedDirector] convertToGL: touchLocation];
[streak setPosition:touchLocation];
}
@end
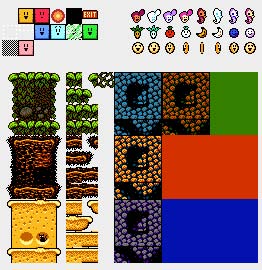
Parallax
Creación de escena para juegos de plataformas.

Utilizando patrones que se repiten sucesivamente.
tiles.png
@implementation Parallax1
-(id) init
{
if( ![super init] )
return nil;
// Top Layer, a simple image
CCSprite *cocosImage = [CCSprite spriteWithFile:@"powered.png"];
// scale the image (optional)
cocosImage.scale = 2.5f;
// change the transform anchor point to 0,0 (optional)
cocosImage.anchorPoint = ccp(0,0);
// Middle layer: a Tile map atlas
CCTileMapAtlas *tilemap = [CCTileMapAtlas tileMapAtlasWithTileFile:@"TileMaps/tiles.png"
mapFile:@"TileMaps/levelmap.tga" tileWidth:16 tileHeight:16];
[tilemap releaseMap];
// change the transform anchor to 0,0 (optional)
tilemap.anchorPoint = ccp(0, 0);
// Aliased images
// [tilemap.texture setAliasTexParameters];
// background layer: another image
CCSprite *background = [CCSprite spriteWithFile:@"background.png"];
// scale the image (optional)
background.scale = 1.5f;
// change the transform anchor point (optional)
background.anchorPoint = ccp(0,0);
// create a void node, a parent node
CCParallaxNode *voidNode = [CCParallaxNode node];
// NOW add the 3 layers to the 'void' node
// background image is moved at a ratio of 0.4x, 0.5y
[voidNode addChild:background z:-1 parallaxRatio:ccp(0.4f,0.5f) positionOffset:CGPointZero];
// tiles are moved at a ratio of 2.2x, 1.0y
[voidNode addChild:tilemap z:1 parallaxRatio:ccp(2.2f,1.0f) positionOffset:ccp(0,-200)];
// top image is moved at a ratio of 3.0x, 2.5y
[voidNode addChild:cocosImage z:2 parallaxRatio:ccp(3.0f,2.5f) positionOffset:ccp(200,800)];
// now create some actions that will move the 'void' node
// and the children of the 'void' node will move at different
// speed, thus, simulation the 3D environment
id goUp = [CCMoveBy actionWithDuration:4 position:ccp(0,-500)];
id goDown = [goUp reverse];
id go = [CCMoveBy actionWithDuration:8 position:ccp(-1000,0)];
id goBack = [go reverse];
id seq = [CCSequence actions:
goUp,
go,
goDown,
goBack,
nil];
[voidNode runAction: [CCRepeatForever actionWithAction:seq ] ];
[self addChild:voidNode];
return self;
}
-(NSString *) title
{
return @"Parallax: parent and 3 children";
}
@end
ParticleView
Visor de particulas.
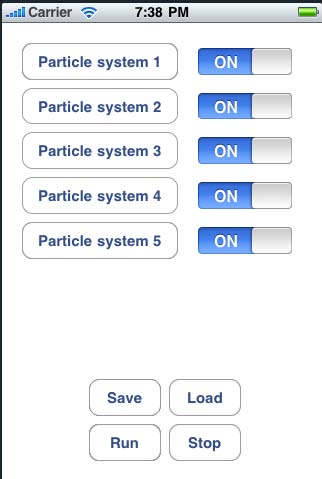
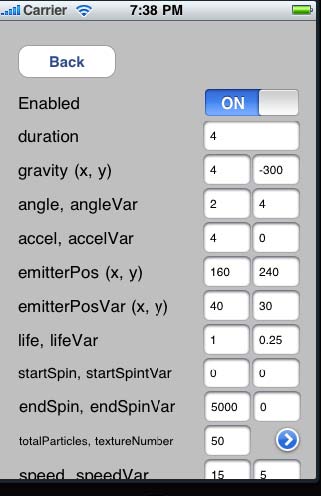
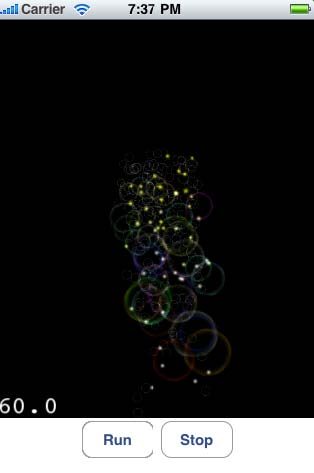
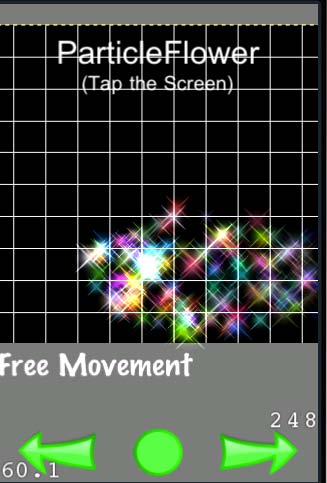
ParticleTest
Test más avanzados de partículas
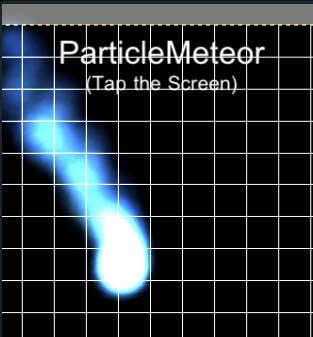
@implementation DemoMeteor
-(void) onEnter
{
[super onEnter];
self.emitter = [CCParticleMeteor node];
[background addChild: emitter z:10];
emitter.texture = [[CCTextureCache sharedTextureCache] addImage: @"fire.pvr"];
[self setEmitterPosition];
}
-(NSString *) title {
return @"ParticleMeteor";
}
@end
Me gusta mucho el efecto de nieve
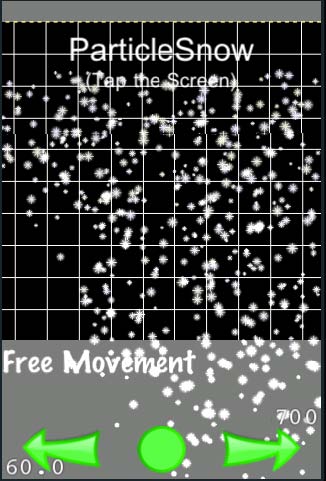
@implementation DemoSnow
-(void) onEnter
{
[super onEnter];
self.emitter = [CCParticleSnow node];
[background addChild: emitter z:10];
CGPoint p = emitter.position;
emitter.position = ccp( p.x, p.y-110);
emitter.life = 3;
emitter.lifeVar = 1;
// gravity
emitter.gravity = ccp(0,-10);
// speed of particles
emitter.speed = 130;
emitter.speedVar = 30;
ccColor4F startColor = emitter.startColor;
startColor.r = 0.9f;
startColor.g = 0.9f;
startColor.b = 0.9f;
emitter.startColor = startColor;
ccColor4F startColorVar = emitter.startColorVar;
startColorVar.b = 0.1f;
emitter.startColorVar = startColorVar;
emitter.emissionRate = emitter.totalParticles/emitter.life;
emitter.texture = [[CCTextureCache sharedTextureCache] addImage: @"snow.png"];
[self setEmitterPosition];
}
-(NSString *) title
{
return @"ParticleSnow";
}
@end
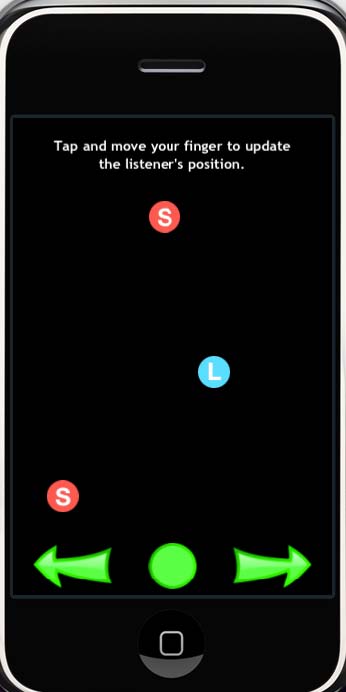
PASoundEngineTest
Pruebas de colisiones y sonido
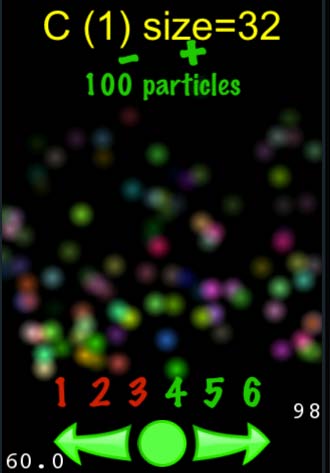
PerformanceTestParticle
Comportamiento do muchas partículas simultáneas.
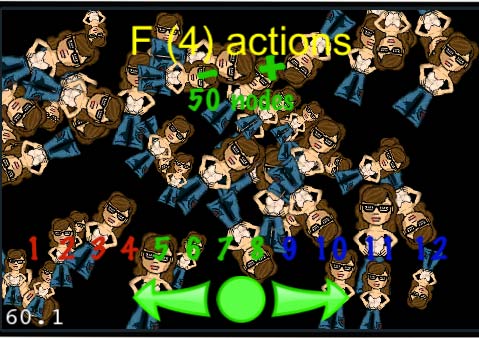
PeformanceTestSprites
Muchos sprites en pantalla
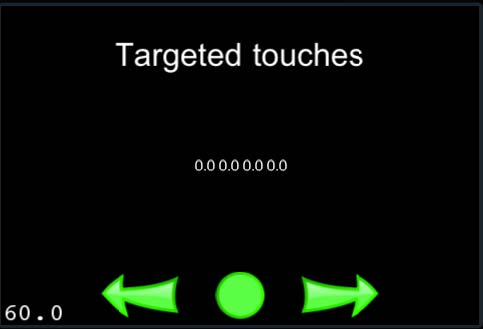
PerformanTestTouches
La pantalla táctil
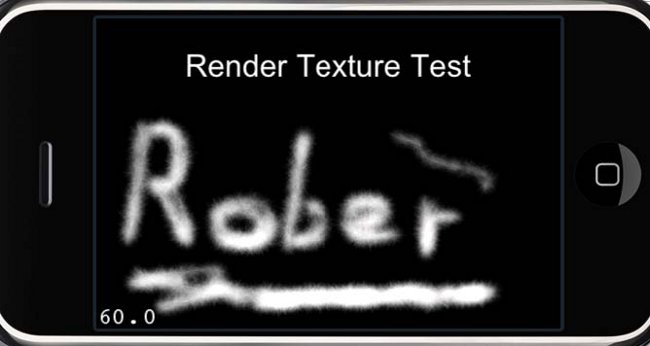
RenderTextureTest
Uso de texturas para pintar.
-(id) init
{ if( (self = [super init]) ) {
CGSize s = [[CCDirector sharedDirector] winSize];
CCLabel* label = [CCLabel labelWithString:@"Render Texture Test" fontName:@"Arial" fontSize:32];
[self addChild:label z:0];
[label setPosition: ccp(s.width/2, s.height-50)];
// create a render texture, this is what we're going to draw into
target = [[CCRenderTexture renderTextureWithWidth:s.width height:s.height] retain];
[target setPosition:ccp(s.width/2, s.height/2)];
// note that the render texture is a cocosnode, and contains a sprite of it's texture for convience,
// so we can just parent it to the scene like any other cocos node
[self addChild:target z:1];
// create a brush image to draw into the texture with
brush = [[CCSprite spriteWithFile:@"stars.png"] retain];
[brush setBlendFunc: (ccBlendFunc) { GL_ONE, GL_ONE_MINUS_SRC_ALPHA }];
[brush setOpacity:20];
isTouchEnabled = YES;
}
return self;
}
......
-(void)ccTouchesMoved:(NSSet *)touches withEvent:(UIEvent *)event
{
UITouch *touch = [touches anyObject];
CGPoint start = [touch locationInView: [touch view]];
start = [[CCDirector sharedDirector] convertToGL: start];
CGPoint end = [touch previousLocationInView:[touch view]];
end = [[CCDirector sharedDirector] convertToGL:end];
// begin drawing to the render texture
[target begin];
// for extra points, we'll draw this smoothly from the last position and vary the sprite's
// scale/rotation/offset
float distance = ccpDistance(start, end);
if (distance > 1)
{
int d = (int)distance;
for (int i = 0; i
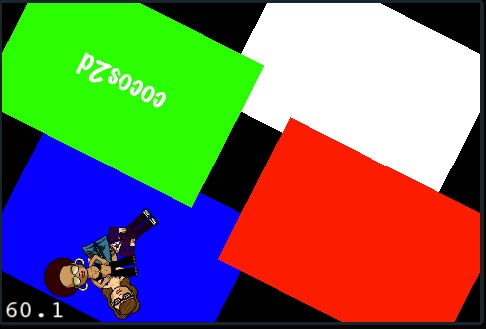
RotareWorldTest
Giro de elementos y movimiento relativo de hijos.
@interface SpriteLayer: CCLayer
{
}
@end
@interface TextLayer: CCLayer
{
}
@end
@interface MainLayer : CCLayer
{
}
@end
Segmento 1
CCScene *scene = [CCScene node];
MainLayer * mainLayer =[MainLayer node];
[scene addChild: mainLayer];
Segmento 2
@implementation MainLayer
-(id) init
{
if( ! [super init] )
return nil;
float x,y;
CGSize size = [[CCDirector sharedDirector] winSize];
x = size.width;
y = size.height;
CCNode* blue = [CCColorLayer layerWithColor:ccc4(0,0,255,255)];
CCNode* red = [CCColorLayer layerWithColor:ccc4(255,0,0,255)];
CCNode* green = [CCColorLayer layerWithColor:ccc4(0,255,0,255)];
CCNode* white = [CCColorLayer layerWithColor:ccc4(255,255,255,255)];
[blue setScale: 0.5f];
[blue setPosition: ccp(-x/4,-y/4)];
[blue addChild: [SpriteLayer node]];
[red setScale: 0.5f];
[red setPosition: ccp(x/4,-y/4)];
[green setScale: 0.5f];
[green setPosition: ccp(-x/4,y/4)];
[green addChild: [TextLayer node]];
[white setScale: 0.5f];
[white setPosition: ccp(x/4,y/4)];
[self addChild: blue z:-1];
[self addChild: white];
[self addChild: green];
[self addChild: red];
CCAction * rot = [CCRotateBy actionWithDuration:8 angle:720];
[blue runAction: rot];
[red runAction: [[rot copy] autorelease]];
[green runAction: [[rot copy] autorelease]];
[white runAction: [[rot copy] autorelease]];
return self;
}
Segmento 3
@implementation TextLayer
-(id) init
{
if( ! [super init] )
return nil;
float x,y;
CGSize size = [[CCDirector sharedDirector] winSize];
x = size.width;
y = size.height;
NSArray *array = [UIFont familyNames];
for( NSString *s in array )
NSLog( @"%@",s );
CCLabel* label = [CCLabel labelWithString:@"cocos2d" fontName:@"Marker Felt" fontSize:64];
[label setPosition: ccp(x/2,y/2)];
[self addChild: label];
return self;
}
-(void) dealloc {
[super dealloc];
}
@end
Al final se para
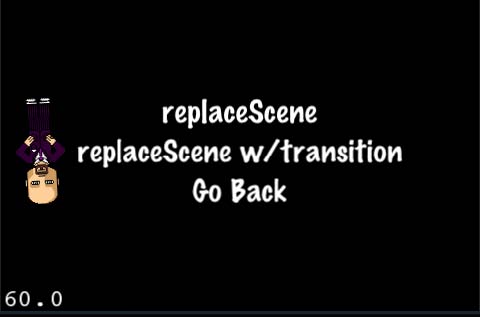
SceneTest
Modificaciones básicas de escena
-(void) onGoBack:(id) sender
{
[[CCDirector sharedDirector] popScene];
}
-(void) onReplaceScene:(id) sender
{
[[CCDirector sharedDirector] replaceScene: [ [CCScene node] addChild: [ Layer3 node] z:0] ];
}
-(void) onReplaceSceneTran:(id) sender
{
CCScene *s = [[CCScene node] addChild: [Layer3 node] z:0];
[[CCDirector sharedDirector] replaceScene: [CCFlipXTransition transitionWithDuration:2 scene:s]];
}
@end

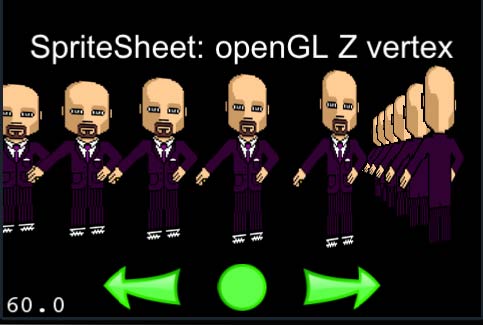
SpriteTest
Pruebas con sprites en distintas posiciones.
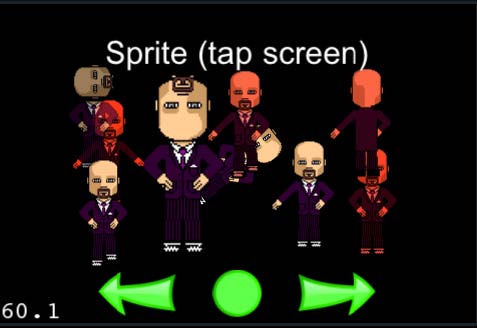
Giros sobre un punto.
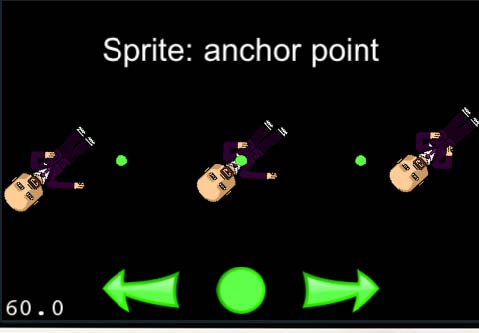
Asociación a ejes 3D
-(id) init
{
if( (self=[super init]) ) {
//
// This test tests z-order
// If you are going to use it is better to use a 3D projection
//
// WARNING:
// The developer is resposible for ordering it's sprites according to it's Z if the sprite has
// transparent parts.
//
dir = 1;
time = 0;
CGSize s = [[CCDirector sharedDirector] winSize];
float step = s.width/12;
CCNode *node = [CCNode node];
// camera uses the center of the image as the pivoting point
[node setContentSize:CGSizeMake(s.width,s.height)];
[node setAnchorPoint:ccp(0.5f, 0.5f)];
[node setPosition:ccp(s.width/2, s.height/2)];
[self addChild:node z:0];
for(int i=0;i
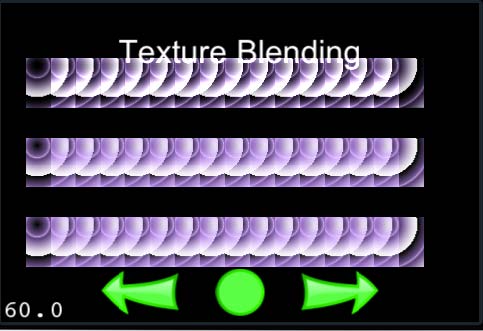
Texture2dTest
Uso te texturas y transparencias
@implementation TextureBlend
-(id) init
{
if( (self=[super init]) ) {
for( int i=0;i
TileMapTest
Más mapas para juegos de plataformas con iphone
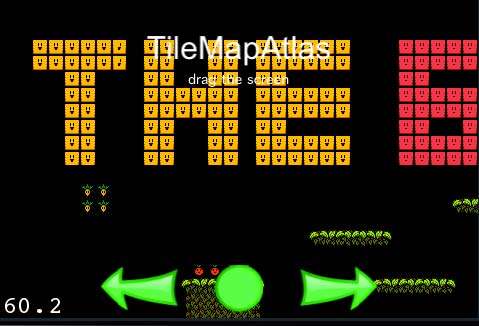
Sorprendente como con unas lineas lo ponemos en perspectiva.
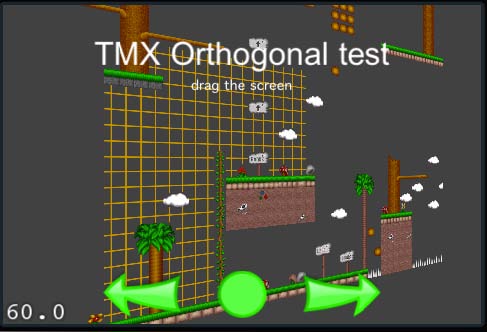
@implementation TMXOrthoTest
-(id) init
{
if( (self=[super init]) ) {
//
// Test orthogonal with 3d camera and anti-alias textures
//
// it should not flicker. No artifacts should appear
//
CCColorLayer *color = [CCColorLayer layerWithColor:ccc4(64,64,64,255)];
[self addChild:color z:-1];
CCTMXTiledMap *map = [CCTMXTiledMap tiledMapWithTMXFile:@"TileMaps/orthogonal-test2.tmx"];
[self addChild:map z:0 tag:kTagTileMap];
CGSize s = map.contentSize;
NSLog(@"ContentSize: %f, %f", s.width,s.height);
for( CCSpriteSheet* child in [map children] ) {
[[child texture] setAntiAliasTexParameters];
}
float x, y, z;
[[map camera] eyeX:&x eyeY:&y eyeZ:&z];
[[map camera] setEyeX:x-200 eyeY:y eyeZ:z+300];
}
return self;
}
-(void) onEnter
{
[super onEnter];
[[CCDirector sharedDirector] setProjection:CCDirectorProjection3D];
}
-(void) onExit
{
[[CCDirector sharedDirector] setProjection:CCDirectorProjection2D];
[super onExit];
}
-(NSString *) title
{
return @"TMX Orthogonal test";
}
@end
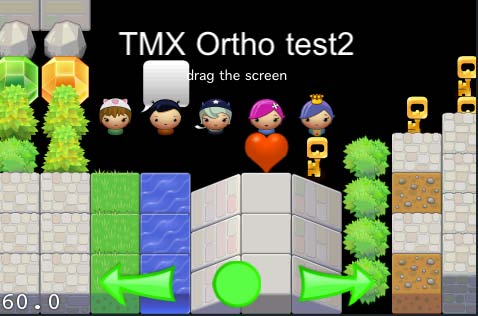
@implementation TMXOrthoTest2
-(id) init
{
if( (self=[super init]) ) {
CCTMXTiledMap *map = [CCTMXTiledMap tiledMapWithTMXFile:@"TileMaps/orthogonal-test1.tmx"];
[self addChild:map z:0 tag:kTagTileMap];
CGSize s = map.contentSize;
NSLog(@"ContentSize: %f, %f", s.width,s.height);
for( CCSpriteSheet* child in [map children] ) {
[[child texture] setAntiAliasTexParameters];
}
[map runAction:[CCScaleBy actionWithDuration:2 scale:0.5f]];
}
return self;
}
-(NSString *) title
{
return @"TMX Ortho test2";
}
@end
Esto de la perspectiva isométrica lo tengo que probar.
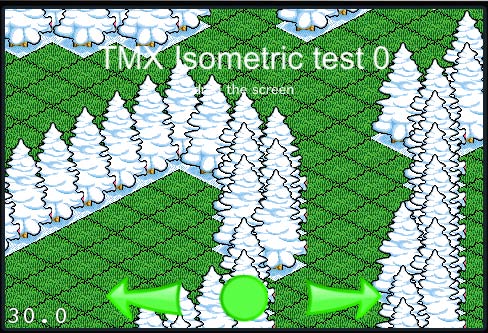
@implementation TMXIsoTest
-(id) init
{
if( (self=[super init]) ) {
CCColorLayer *color = [CCColorLayer layerWithColor:ccc4(64,64,64,255)];
[self addChild:color z:-1];
CCTMXTiledMap *map = [CCTMXTiledMap tiledMapWithTMXFile:@"TileMaps/iso-test.tmx"];
[self addChild:map z:0 tag:kTagTileMap];
// move map to the center of the screen
CGSize ms = [map mapSize];
CGSize ts = [map tileSize];
[map runAction:[CCMoveTo actionWithDuration:1.0f position:ccp( -ms.width * ts.width/2, -ms.height * ts.height/2 ) ]];
}
return self;
}
-(NSString *) title
{
return @"TMX Isometric test 0";
}
@end
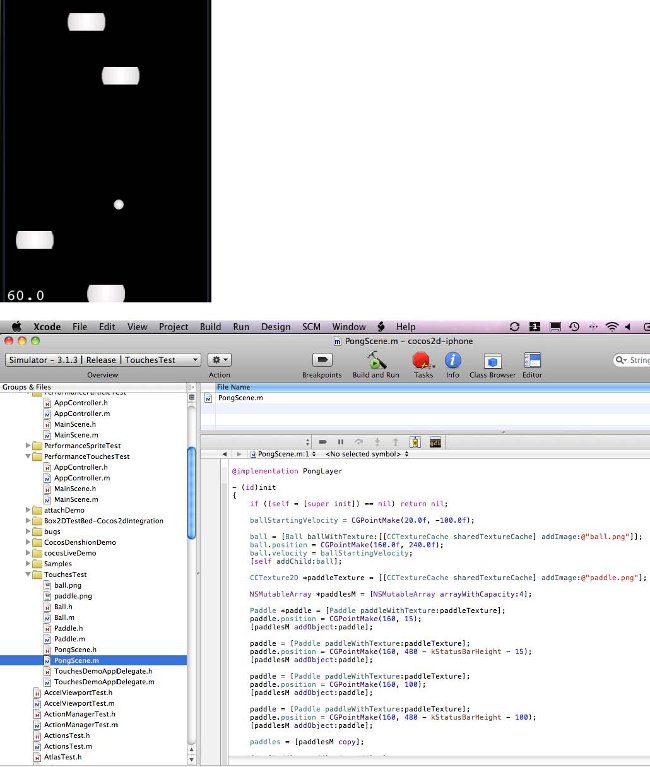
TouchesTest
Un pequeño jueguecito de tenis
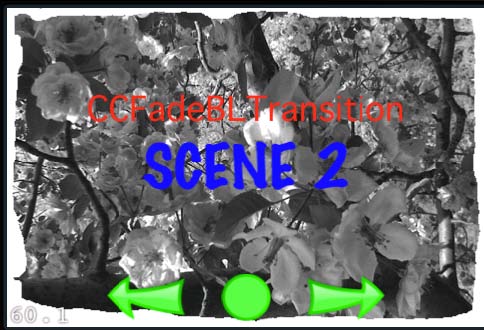
TransitionTest
Transiciones de una escena a otra.
-(void) nextCallback:(id) sender
{
Class transition = nextTransition();
CCScene *s2 = [TextLayer2 node];
[[CCDirector sharedDirector] replaceScene: [transition transitionWithDuration:TRANSITION_DURATION scene:s2]];
}
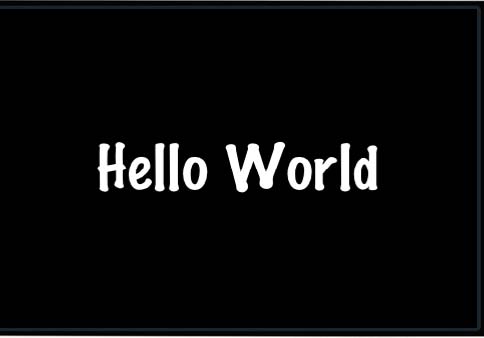
Hello World
Un ejemplo de los más básicos.
-(id) init
{
// always call "super" init
// Apple recommends to re-assign "self" with the "super" return value
if( (self=[super init] )) {
// create and initialize a Label
CCLabel* label = [CCLabel labelWithString:@"Hello World" fontName:@"Marker Felt" fontSize:64];
// ask director the the window size
CGSize size = [[CCDirector sharedDirector] winSize];
// position the label on the center of the screen
label.position = ccp( size.width /2 , size.height/2 );
// add the label as a child to this Layer
[self addChild: label];
}
return self;
}
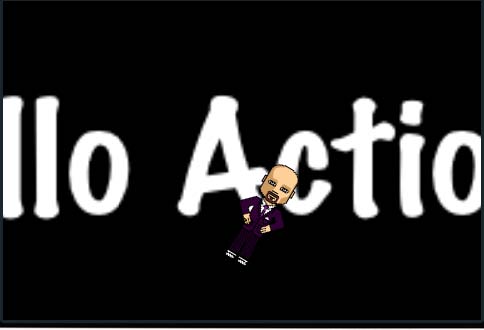
Hello Action
Acciones y movimientos básicos.
// on "init" you need to initialize your instance
-(id) init
{
// always call "super" init
// Apple recommends to re-assign "self" with the "super" return value
if( (self=[super init] )) {
//
// Label
//
// create and initialize a Label
CCLabel* label = [CCLabel labelWithString:@"Hello Actions" fontName:@"Marker Felt" fontSize:64];
// ask director the the window size
CGSize size = [[CCDirector sharedDirector] winSize];
// position the label on the center of the screen
// "ccp" is a helper macro that creates a point. It means: "CoCos Point"
label.position = ccp( size.width /2 , size.height/2 );
// add the label as a child to this Layer
[self addChild: label];
// objective-c can be an static or dynamic language.
// "id" is a reserved word that means "this is an object, but I don't care it's type"
// scales the label 2.5x in 3 seconds.
id action = [CCScaleBy actionWithDuration:3.0f scale:2.5f];
// tell the "label" to run the action
// The action will be execute once this Layer appears on the screen (not before).
[label runAction:action];
//
// Sprite
//
CCSprite *sprite = [CCSprite spriteWithFile:@"grossini.png"];
sprite.position = ccp( 0, 50);
// z is the z-order. Greater values means on top of lower values.
// default z value is 0.
// So the sprite will be on top of the label.
[self addChild:sprite z:1];
// create a RotateBy action.
// "By" means relative. "To" means absolute.
id rotateAction = [CCRotateBy actionWithDuration:4 angle:180*4];
// create a JumpBy action.
id jumpAction = [CCJumpBy actionWithDuration:4 position:ccp(size.width,0) height:100 jumps:4];
// spawn is an action that executes 2 or more actions at the same time
id fordward = [CCSpawn actions:rotateAction, jumpAction, nil];
// almost all actions supports the "reverse" method.
// It will create a new actions that is the reversed action.
id backwards = [fordward reverse];
// Sequence is an action that executes one action after another one
id sequence = [CCSequence actions: fordward, backwards, nil];
// Finally, you can repeat an action as many times as you want.
// You can repeat an action forever using the "RepeatForEver" action.
id repeat = [CCRepeat actionWithAction:sequence times:2];
// Tell the sprite to execute the actions.
// The action will be execute once this Layer appears on the screen (not before).
[sprite runAction:repeat];
}
return self;
}
Hello Events
Seguimos con ejemplos básicos.

// on "init" you need to initialize your instance
-(id) init
{
// always call "super" init
// Apple recommends to re-assign "self" with the "super" return value
if( (self=[super init] )) {
// isTouchEnabled is an property of Layer (the super class).
// When it is YES, then the touches will be enabled
self.isTouchEnabled = YES;
// isTouchEnabled is property of Layer (the super class).
// When it is YES, then the accelerometer will be enabled
self.isAccelerometerEnabled = YES;
//
// CCLabel
//
// create and initialize a CCLabel
CCLabel* label = [CCLabel labelWithString:@"Hello Events" fontName:@"Marker Felt" fontSize:64];
// ask director the the window size
CGSize size = [[CCDirector sharedDirector] winSize];
// position the label on the center of the screen
// "ccp" is a helper macro that creates a point. It means: "CoCos Point"
label.position = ccp( size.width /2 , size.height/2 );
// add the label as a child to this Layer
[self addChild: label];
//
// Sprite
//
CCSprite *sprite = [CCSprite spriteWithFile:@"grossini.png"];
sprite.position = ccp( 50, 50);
// z is the z-order. Greater values means on top of lower values.
// Default z value is 0. So the sprite will be on top of the label.
// Add the sprite with a tag, so we can later 'get' the sprite by this tag
[self addChild:sprite z:1 tag:kTagSprite];
}
return self;
}
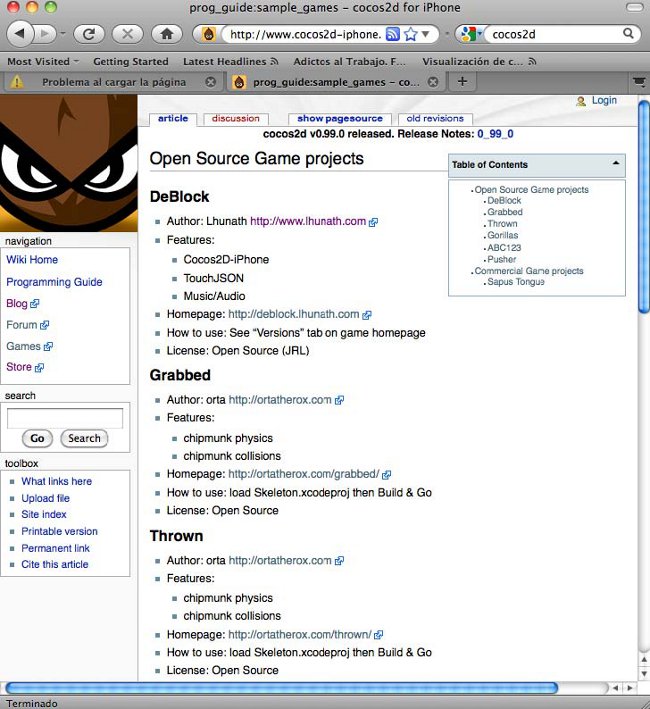
Otros recurso a investigar son los juegos completos ... yo personalmente los voy a investigar para tener una idea más completa antes de lanzarme a hacer nada. http://www.cocos2diphone.org/wiki/doku.php/prog_guide:sample_games